When automating Google Sheets with Apps Script, two triggers are often confused: onEdit and onChange. They behave differently, and this short guide summarizes what actually triggers each one.
What triggers each event
Action in the spreadsheet
onEdit
onChange
Edit a cell value
✔️
✔️
Insert a row or column
❌
✔️
Delete a row or column
❌
✔️
Change background color or font
❌
✔️
Create or delete a sheet
❌
✔️
Move a column or row with data
✔️
✔️
Move a column or row without data
❌
✔️
Key idea
onEdit reacts to data edits inside cells.
onChange reacts to structural changes in the spreadsheet.
This means that formatting changes, sheet structure modifications, or column insertions will not trigger onEdit, but will trigger onChange.
Comparing the event objects
Another major difference is the object passed to the function.
Example: onEdit(e)
onEdit provides detailed information about the edited range.
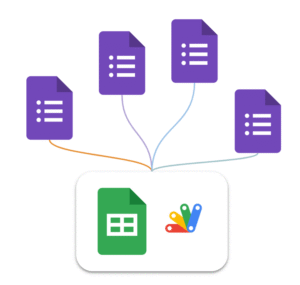
When working with Google Forms + Google Sheets, a common setup is to connect several forms to the same spreadsheet. Each form creates its own response sheet automatically.
This works well at first. But as soon as you want to automate workflows with Google Apps Script, things become messy.
Typical situations:
You have multiple forms for different processes (client onboarding, support requests, event registrations, etc.)
Each form writes responses into a different sheet of the same spreadsheet
You want to trigger different automation logic depending on the form
The issue is that the Form Submit trigger in Google Sheets does not allow you to specify a different function depending on which form submitted the response.
The approach I use is to create one global trigger function that runs whenever a form submission occurs. This function then routes the event to the appropriate handler, based on the sheet that received the response.
A Single Dispatcher Trigger
The e object returned by the trigger provides the context of the event. From it, we can retrieve the range that triggered the execution, then access the sheet, and finally obtain the sheet name using function chaining.
const sheetName = e.range.getSheet().getName();
From there, we can decide which process should handle the submission.
Here is an example which can be easily
function Main_FormDispatcher(e) {

  // Get sheet name to retrieve what form was submitted
  const sheetName = e.range.getSheet().getName();

  Logger.log(`Form response received from sheet: ${sheetName}`);

  // Dispatch event
  if (sheetName === "Client Intake Responses") {
    processClientIntake(e);
  } else if (sheetName === "Bug Report Responses") {
    processBugReport(e);
  } else if (sheetName === "Newsletter Signup Responses") {
    processNewsletterSignup(e);
  } else {
    Logger.log(`Unknown form sheet detected: ${sheetName}`);
  }
}
If you regularly build Google Workspace automations, structuring your scripts around dispatcher functions like this one will save you a lot of time and complexity later.
One of the biggest strengths of Google Apps Script is how easily it interacts with other Google products. Reading a Google Sheet, creating a Drive file, or updating a document requires almost no setup. You don’t have to think about authentication, token management, or security flows. Google automatically prompts the required scopes and takes care of the authorization for you.
This convenience can make OAuth feel invisible, even unnecessary. Until the day your script needs to talk to something outside Google.
This article takes a step back to explain what OAuth and OAuth 2.0 actually are, why Apps Script usually hides them from you, and what changes when you integrate external services. We’ll also look at how the OAuth2 library fits into the picture when built-in authorization is no longer enough.
OAuth in simple terms
OAuth 2.0 allows an application to access a user’s data without ever handling their password. Instead of sharing credentials, the user approves a limited set of permissions, and the service issues a token representing what the application is allowed to do and for how long.
In an OAuth flow, the user authenticates directly with the service that owns the data. Once consent is given, the service provides a token to the application. From that point on, the application uses this token to make requests, and the service validates it before allowing access. The application never sees the user’s credentials.
OAuth 2.0 is an evolution of the original OAuth concept. It formalizes this permission model using short-lived access tokens and refresh tokens, making integrations more secure, easier to revoke, and better suited to modern applications. Today, when we talk about OAuth, we almost always mean OAuth 2.0.
OAuth in Apps Script
When an Apps Script project interacts only with Google products, OAuth is handled entirely by the platform. Permissions are inferred from the services you use, Google displays the consent screen, and tokens are stored and refreshed automatically. In this context, we don’t really htink about OAuth at all.
You can see the project scopes in the information panel
This changes as soon as your script needs to communicate with a service outside Google.
Most external APIs rely on OAuth 2.0, which means your script must explicitly request user consent, obtain access tokens, refresh them when they expire, and attach them to API requests. At this point, OAuth is no longer automatic and becomes part of your implementation.
To make this manageable, Apps Script relies on a community OAuth2 library. The library implements the OAuth 2.0 protocol for you, handling redirects, callbacks, token exchanges, storage, and refresh logic. You configure it once, then reuse it whenever your script needs to authenticate with the external API.
How the OAuth2 library works in Apps Script
The OAuth2 library revolves around the idea of a service. A service represents a configured OAuth connection to an external provider. It contains everything needed to authenticate with that API:
Authorization URL This is the endpoint where the user is redirected to grant consent. It displays the provider’s login and consent screen and is the entry point of the OAuth flow.
Token endpoint This endpoint is used after consent is granted. It exchanges the authorization code for an access token (and usually a refresh token), and is also used later to refresh expired access tokens.
Client credentials (Client ID and Client Secret) These identify your Apps Script project to the OAuth provider. They are issued when you register your application and allow the provider to trust who is requesting tokens.
Requested scopes Scopes define what the application is allowed to do. They limit access to specific actions or resources and are shown to the user on the consent screen.
Callback function This is the function Apps Script calls after the provider redirects back to your project. It completes the OAuth flow by handing the response to the library, which then retrieves and stores the tokens.
Property store This defines where access and refresh tokens are persisted. The service uses PropertiesService to store tokens so the user does not need to re-authorize on every execution.
In short, the service is the OAuth contract between Apps Script and an external provider. Once configured, your code no longer deals with OAuth mechanics directly, it simply asks the service for a valid access token and makes API requests.
A short example
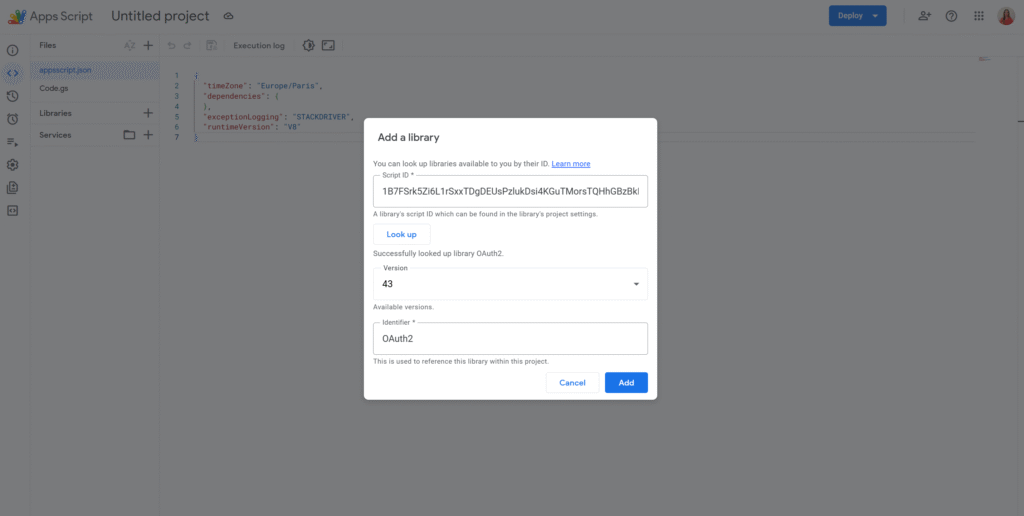
The first step is to add the OAuth2 library to your Apps Script project. This can be done by searching for the library using its script ID:
/**
 * Creates and returns the OAuth2 service.
 * @returns {OAuth2.Service}
 */
function getService_() {
  return OAuth2.createService('MyApi')

    // Authorization and token endpoints provided by the API
    .setAuthorizationBaseUrl('https://example.com/oauth/authorize')
    .setTokenUrl('https://example.com/oauth/token')

    // Credentials issued by the provider
    .setClientId('YOUR_CLIENT_ID')
    .setClientSecret('YOUR_CLIENT_SECRET')

    // Callback function called after user consent
    .setCallbackFunction('authCallback')

    // Where tokens are stored
    .setPropertyStore(PropertiesService.getUserProperties())

    // Permissions requested
    .setScope('read write');
}
Apps Script cannot redirect automatically, so you typically show the authorization URL as a link.
/**
 * Shows an authorization link if access is missing.
 */
function authorize() {
  const service = getService_();

  if (!service.hasAccess()) {
    const url = service.getAuthorizationUrl();
    Logger.log('Authorize this app by visiting: %s', url);
  }
}
This function is called by Apps Script when the provider redirects back after consent.
Once authorized, the library automatically returns a valid token and refreshes it if needed.
/**
 * Makes an authenticated API request.
 */
function callApi() {
  const service = getService_();

  if (!service.hasAccess()) {
    throw new Error('Service not authorized');
  }

  const response = UrlFetchApp.fetch('https://example.com/api/data', {
    headers: {
      Authorization: 'Bearer ' + service.getAccessToken()
    }
  });

  Logger.log(response.getContentText());
}
Conclusion
OAuth can feel complex at first, but in practice it follows a simple idea: allowing an application to act on behalf of a user without ever handling their credentials. In Google Apps Script, this complexity is often hidden when working with Google services, which is why OAuth can go unnoticed for a long time.
As soon as you integrate an external API, OAuth becomes explicit. The OAuth2 library provides a structured and reliable way to handle authorization, token storage, and refresh logic, without forcing you to reimplement the OAuth 2.0 protocol yourself. Once the service is configured, the rest of your code can focus purely on business logic and API interactions.
To go further, see the follow-up article with a complete OAuth2 implementation in Apps Script using Xero.