Apps Script Logging Best Practices: console, Logger, Cloud Logging, and a Production-Ready Logging System

Logging in Google Apps Script is easy when you are testing a small script in the editor. It becomes much more important when the project turns into a real web app used by other people.

At that stage, logs are no longer just for debugging. They help you understand what happened, where a request failed, which user was affected, and whether the same issue is happening again. That is why it is worth understanding the difference between console, Logger, and Cloud Logging, and how to build a cleaner logging system for production.

console vs Logger in Apps Script

Apps Script gives you two main ways to write logs: console and Logger.

console is the most familiar if you come from JavaScript. It is convenient for quick debugging with methods like console.log(), console.warn(), and console.error(). It is also the best option for timing code with console.time() and console.timeEnd(). (Class console)

Logger is a better fit for structured logs. Google’s documentation explicitly points out that Logger works well with structured JSON data, which is useful when logs are sent to Cloud Logging and need to be filtered later. (Class Logger)

In simple terms, console is better for quick debugging and timing. Logger is better for cleaner, searchable application logs.

The limits of logging in deployed Apps Script web apps

Basic logging works well while you are testing from the Apps Script editor. But once a web app is deployed, the built-in execution log quickly shows its limits.

Google explains that the execution log is mainly meant for development and debugging, and that those logs do not persist for very long. That makes it fine for short-term troubleshooting, but not ideal for production follow-up. (Logging)

This is usually where developers get stuck. They can write logs, but they cannot easily search across executions, track repeated failures, or build alerts. For that, the right tool is Cloud Logging.

Why Cloud Logging matters

Cloud Logging is what makes Apps Script logging feel more professional.

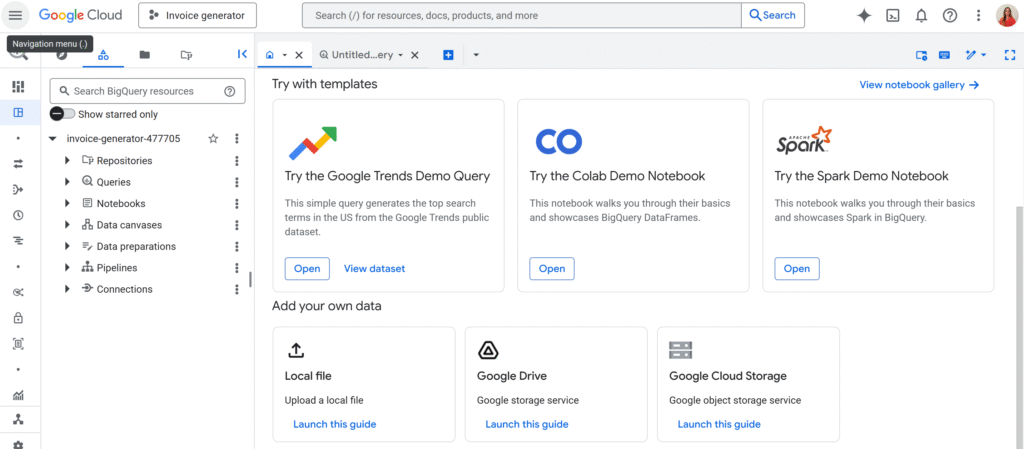
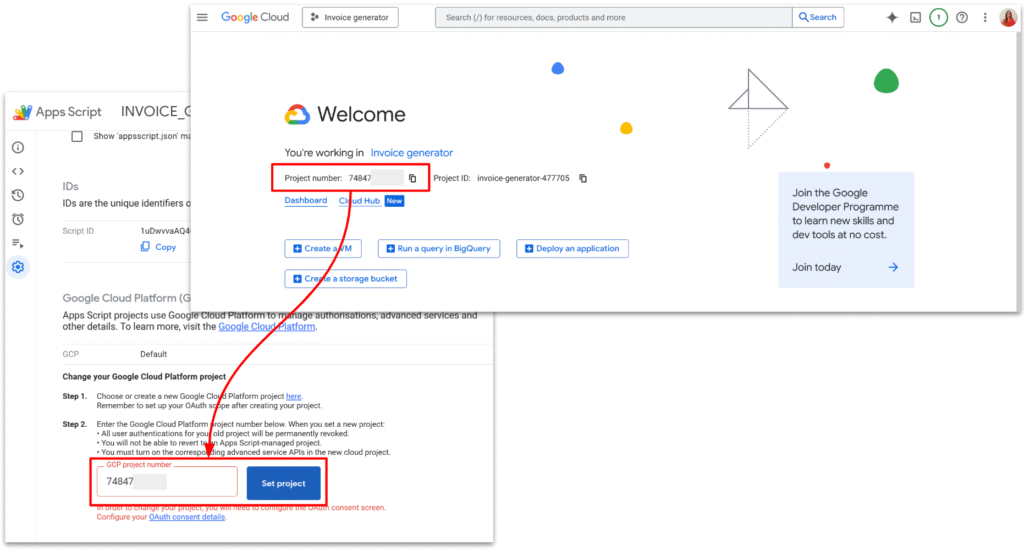
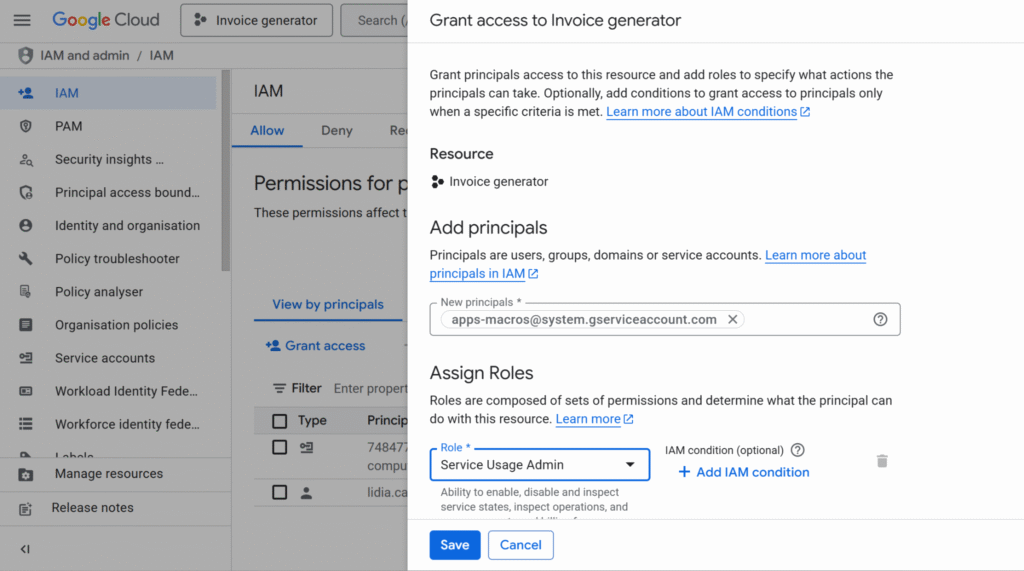
When your Apps Script project is linked to a standard Google Cloud project, your logs can be viewed in Google Cloud’s Logs Explorer instead of only in the Apps Script interface. That gives you much better filtering, longer-term visibility, and access to tools like Error Reporting and log-based metrics. (Google Cloud projects)

You can use a single GCP project for several Apps Script projects

This becomes especially useful for web apps. Instead of scanning plain text logs manually, you can search by severity, message, or your own custom fields such as requestId, route, or event. (Logging query language)

Another very useful feature is the temporary active user key. Google recommends using it to correlate logs to a user session without storing personal data like email addresses. (feedbackLogging)

What a production-style logging system looks like

A good logging system in Apps Script does not need to be complicated. It just needs structure.

The main idea is that every important action should be logged with context. Instead of writing random messages like "step 1" or "here", it is much better to log a clear event with fields such as:

event, requestId, route, userKey, severity, and a small context object.

That gives you logs that are easier to read and much easier to query later in Cloud Logging.

A strong approach is to use Logger for business events and console.time() for performance tracking. That gives you both structured logs and timing data without mixing everything together. (Class Logger)

A simple production-ready logging utility

Here is a practical example you can reuse in an Apps Script web app:

/**
 * Create a request-scoped logging context.
 *
 * @param {Object} options
 * @param {string} options.route
 * @param {string=} options.requestId
 * @param {Object=} options.context
 * @returns {{route: string, requestId: string, userKey: string, context: Object}}
 */
function createLogContext(options) {
  return {
    route: options.route || "unknown",
    requestId: options.requestId || Utilities.getUuid(),  // To track that one request in Cloud Logging
    userKey: Session.getTemporaryActiveUserKey(),
    context: options.context || {}
  };
}

/**
 * Write a structured application log.
 *
 * @param {string} message
 * @param {Object} details
 * @param {string} details.event
 * @param {string=} details.severity
 * @param {string} details.route
 * @param {string} details.requestId
 * @param {string} details.userKey
 * @param {Object=} details.context
 * @returns {void}
 */
function logEvent(message, details) {
  Logger.log({
    message,
    event: details.event,
    severity: details.severity || "INFO",
    route: details.route,
    requestId: details.requestId,
    userKey: details.userKey,
    context: details.context || {},
    timestamp: new Date().toISOString()
  });
}

/**
 * Write a structured error log.
 *
 * @param {Error} error
 * @param {Object} details
 * @param {string} details.route
 * @param {string} details.requestId
 * @param {string} details.userKey
 * @param {Object=} details.context
 * @returns {void}
 */
function logError(error, details) {
  Logger.log({
    message: error.message || "Unknown error",
    event: "application_error",
    severity: "ERROR",
    route: details.route,
    requestId: details.requestId,
    userKey: details.userKey,
    context: details.context || {},
    name: error.name || "Error",
    stack: error.stack || "",
    timestamp: new Date().toISOString()
  });

  console.error(error);
}

This kind of utility already makes a big difference. It gives each request a consistent identity and makes logs much easier to follow.

What to log

For a deployed Apps Script web app, the most useful logs are usually the start of a request, the main business event, the final result, the duration of slow steps, and any real error.

What you should avoid is logging huge payloads, full spreadsheet rows, or personal data. Logs should stay useful, readable, and lightweight. Google also documents limits and quotas for Cloud Logging, so smaller structured logs are usually the better choice. (Quotas and limits)

The real best practice

The best practice is not choosing between console and Logger as if one were always better.

Use console for quick debugging and timing. Use Logger for structured events. Use Cloud Logging when the project becomes important enough to need real visibility. Then, if needed, turn recurring log patterns into metrics and alerts. (Log-based metrics overview)

That is the point where logging in Apps Script becomes genuinely useful for production, especially for web apps.

Turn an Apps Script project into an API (and Test It with Postman)

I’ve been doing freelancing for 5+ years now. Every month, I’d add a new row in my follow-up spreadsheet, duplicate my invoice, and export it as PDF to send by email. Yes, manually.

In French we say: “les cordonniers sont toujours les plus mal chaussés”. (or “the cobbler’s children go barefoot” in English).

Well I’ve decided this has to stop, and I’ve been working on a custom SaaS to handle my invoices in a proper way! Backend runs on Cloud Run, the UI is a simple web app. And for the invoice document generation itself… I’m using Apps Script!

In this article, I’ll focus on the Apps Script project itself, and its deployment so that it can be called from another app or from Postman to start with.

The connection with the SaaS itself will be for another article!

Why use Apps Script as an API?

You get a lot for free!

  • Google Docs is your template engine (layout, fonts, logo… all in the editor)
  • Drive stores your invoices in the right folder
  • Apps Script can run as you and use your Drive/Docs permissions
  • You get an HTTP endpoint that your backend (or Postman) can POST JSON to

Also, my entire blog is about Apps Script, so…

So the main idea in our example is:

  1. Have a Docs template with placeholders like {{ClientName}}, {{TotalPrice}}.
  2. Send a JSON payload to a Web App URL.
  3. Apps Script copies the template, replaces the tags, and returns the document URL.

No custom PDF rendering, no extra infra.

The Apps Script “Invoice API” code

We will first create a new Apps Script project. By default, Apps Script links new project to GCP, but for the next steps, we will need to manually link our GCP project.

I also setup a very simple invoice template, with the tags I wanted.

Here is the full code.

/**
 * Web app entry point for POST requests.
 * Expects JSON payload with:
 * {
 *   "tempId": "TEMPLATE_DOC_ID" | "templateId",
 *   "folderId": "DRIVE_FOLDER_ID",
 *   "filename": "Invoice 001",
 *   "tags": {
 *     "InvoiceNumber": "Lidia",
 *     "date": "123 €",
 *     "ClientName":"",
 *   }
 * }
 *
 * @param {GoogleAppsScript.Events.DoPost} e - The POST event.
 * @returns {GoogleAppsScript.Content.TextOutput} JSON response.
 */
function doPost(e) {
  let output;

  try {
    if (!e || !e.postData || !e.postData.contents) {
      throw new Error("Missing POST body.");
    }
    const payload = JSON.parse(e.postData.contents);

    const result = createInvoiceFromTemplate_(payload);

    const response = {
      success: true,
      invoiceId: result.id,
      invoiceUrl: result.url,
      filename: result.name,
    };

    output = ContentService
      .createTextOutput(JSON.stringify(response))
      .setMimeType(ContentService.MimeType.JSON);
  } catch (err) {
    const errorResponse = {
      success: false,
      error: String(err && err.message ? err.message : err),
    };

    output = ContentService
      .createTextOutput(JSON.stringify(errorResponse))
      .setMimeType(ContentService.MimeType.JSON);
  }

  return output;
}

/**
 * @typedef {Object} InvoiceRequestPayload
 * @property {string} [tempId] - Template document ID (legacy name).
 * @property {string} [templateId] - Template document ID (preferred name).
 * @property {string} [folderId] - Drive folder ID where the new doc should be stored.
 * @property {string} filename - Name for the new document.
 * @property {Object.<string, string|number|boolean|null>} tags - Map of placeholders to values.
 */

/**
 * @typedef {Object} InvoiceCreationResult
 * @property {string} id - Created document ID.
 * @property {string} url - Created document URL.
 * @property {string} name - Created document name.
 */

/**
 * Creates an invoice document from a template and replaces placeholders.
 *
 * @param {InvoiceRequestPayload} payload - Data describing the invoice to create.
 * @returns {InvoiceCreationResult} Information about the created document.
 */
function createInvoiceFromTemplate_(payload) {
  if (!payload) {
    throw new Error("Payload is required.");
  }

  const templateId = payload.templateId || payload.tempId;
  if (!templateId) {
    throw new Error("templateId (or tempId) is required.");
  }

  if (!payload.filename) {
    throw new Error("filename is required.");
  }


  let templateFile;
  try {
    templateFile = DriveApp.getFileById(templateId)
  } catch (err) {
    throw new Error("Template file not found or inaccessible.");
  }

  /** @type {GoogleAppsScript.Drive.Folder} */
  let targetFolder;

  if (payload.folderId) {
    try {
      targetFolder = DriveApp.getFolderById(payload.folderId);
    } catch (err) {
      throw new Error("Target folder not found or inaccessible.");
    }
  } else {
    // Fallback: use the template's parent folder if possible, or root
    const parents = templateFile.getParents();
    targetFolder = parents.hasNext() ? parents.next() : DriveApp.getRootFolder();
  }

  const copy = templateFile.makeCopy(payload.filename, targetFolder);
  const newDocId = copy.getId();
  const newDocUrl = copy.getUrl();

  const tags = payload.tags || {};
  if (Object.keys(tags).length > 0) {
    replaceTagsInDocument_(newDocId, tags);
  }

  return {
    id: newDocId,
    url: newDocUrl,
    name: copy.getName(),
  };
}

/**
 * Replaces placeholders in a Google Docs document body.
 * Placeholders are expected in the form {{key}}.
 *
 * @param {string} docId - ID of the document to update.
 * @param {Object.<string, string|number|boolean|null>} tags - Map of placeholders to values.
 * @returns {void}
 */
function replaceTagsInDocument_(docId, tags) {
  const doc = DocumentApp.openById(docId);
  const body = doc.getBody();

  const entries = Object.entries(tags);

  for (const [key, rawValue] of entries) {
    const value = rawValue === null || rawValue === undefined ? "" : String(rawValue);
    const placeholder = "{{" + key + "}}";

    body.replaceText(escapeForRegex_(placeholder), value);

  }

  doc.saveAndClose();
}

/**
 * Escapes a string to be used safely inside a regular expression.
 *
 * @param {string} text - Raw text to escape.
 * @returns {string} Escaped text safe to use in a regex.
 */
function escapeForRegex_(text) {
  return text.replace(/[.*+?^${}()|[\]\\]/g, "\\$&");
}

Web App vs Execution API vs Library, in plain terms

There are three “flavours” of Apps Script that often get mixed up:

  • Web App: you deploy doGet / doPost, you get a /exec URL.
    Perfect for what we’re doing: lightweight HTTP API.
  • Execution API: URL on script.googleapis.com like .../scripts/ID:run.
    Needs OAuth tokens, used to run script functions from other backends. Great, but heavier.
  • Library: reusable code for other Apps Script projects. Not an HTTP endpoint.

In this tutorial, the only one we need is the Web App deployment.
In the upcoming article, we will focus on how to setup OAuth tokens with the execution API.

Deploying as Web App

In the Apps Script editor:

  1. Deploy → Manage deployments → New deployment
  2. Type: Web app
  3. Execute as: Me
  4. Who has access: Anyone (or “Anyone with the link” while testing)
  5. Deploy and copy the Web app URL (ends in /exec)

Open that URL once in your browser, go through the “unverified app” screen, and accept the scopes.

From now on:

  • The script runs as you (so it can access your Docs and Drive)
  • Your backend and Postman can call the /exec URL without any extra OAuth dance

Testing the API with Postman

In Postman:

  • Method: POST
  • URL: your /exec Web App URL
  • Headers: Content-Type: application/json
  • Body → raw → JSON:
{
  "templateId": "1H1bFyR3VPI8U5CO_EDqCOOx5k_p6CFGw0HcfwyQ0vvw",
  "folderId": "1R0Izx-_pA0HYurhb25pZ2Hqd8RWOlnUG",
  "filename": "Invoice-POSTMAN-TEST-001",
  "tags": {
    "myName": "Lidia",
    "MyAddress": "Surf Camp",
    "ClientName": "Client",
    "ClientAddress": "ClientAddress",
    "Month": "November",
    "amountExcl": "120.00",
    "qty": "20",
    "Price": "100",
    "TotalTaxFree": "2000",
    "TaxRate": "20",
    "TaxTotal": "200",
    "TotalPrice": "2400"
  }
}

Click Send.
If everything is set up correctly, you should get JSON like:

And the tags have been replaced!

The weird Drive “server error” and apps-macros@system.gserviceaccount.com

When I first tried calling DriveApp.getFileById(templateId), I had the following error:

And in the console of Apps Script:

The template existed. It opened fine in Drive.
The script was running as the same user.
But inside the Apps Script project (linked to a Cloud project), Drive access was just… failing.

This error happens because Apps Script relies on a Google-managed system account behind the scenes, and that account doesn’t have the permissions it needs to run your script.
To fix it, you have to manually grant the right role to apps-macros@system.gserviceaccount.com.

You won’t see this address in the “Service Accounts” list, but it’s still a real identity in your project that you can add in IAM and assign roles to.

To fix it, I had to:

  1. Go to IAM & Admin → IAM in the Cloud Console.
  2. Click Grant access.
  3. Add a new principal:
    apps-macros@system.gserviceaccount.com
  4. Give it the role: Service Usage Admin.
  5. Save.

After that, API began returning normal JSON responses instead of that generic “server error”.

Wrapping up

Using Apps Script as an API is a nice combo when:

  • You already live in Google Workspace
  • You want invoices/letters/contracts as Docs, not PDFs generated from scratch
  • You’re happy to let Google Drive handle storage and sharing

The flow looks like this:

  1. Frontend or backend creates invoice data.
  2. Backend calls the Apps Script Web App with JSON.
  3. Apps Script copies the template, replaces tags, and responds with the document URL.
  4. You store the URL in your database and show it in your UI.

And if you ever see that mysterious Drive “server error” in a linked project, check the logs and don’t be afraid to give apps-macros@system.gserviceaccount.com the role it’s asking for.

In the next article, we’ll look at how to connect an app to this API and how to integrate Apps Script into more complex, real-world workflows.

Deploy your first backend to Cloud Run (with a Node / React-friendly example)

If you’ve been living in the comfy world of Apps Script and suddenly need “a real backend”, Google Cloud Run is a perfect next step.

You still don’t manage servers.
But now you can run any containerized app: Node, React SSR, Python, Go, whatever.

In this tutorial, we’ll:

  • Explain what Cloud Run is in simple terms.
  • Build a tiny Node.js HTTP API (which could just as well serve a React app).
  • Deploy it to Cloud Run from source with a single gcloud run deploy command (no Docker installed locally).
  • Get a public HTTPS URL you can call from your frontend (React, Apps Script, or anything).

I will also include every relevant links in order to have evrything in one place 🙂

What is Cloud Run (in human words)?

Cloud Run is a serverless platform for containers:

  • You package your code as a container image (or just push your source code and let Google build that image).
  • Cloud Run runs that container on Google’s infrastructure, scaling up and down automatically depending on traffic.
  • It can even scale to zero when nobody calls your service, so you don’t pay when it’s idle. Cloud Run documentation
  • It works with any language or framework that can run in a container and listen for HTTP requests on the port specified by the PORT environment variable. Build sources to containers

If you’re used to Apps Script web apps:

Think of Cloud Run as “Web Apps, but for any container you want, not just Apps Script.”

What we’ll build

We’ll deploy a very small Node.js backend:

  • GET / → returns a JSON message.
  • It listens on the PORT environment variable (so Cloud Run can wire it correctly).
  • We’ll deploy it using “Deploy from source”, which builds the container for you via buildpacks. Deploy services from source code

The exact same steps apply if your “backend” is a React SSR app, Next.js app, or any Node-based server.

Prerequisites

You’ll need:

  1. A Google account.
  2. A Google Cloud project with billing enabled. I personally always setup a max budget to avoid any surprise 🙂
  3. Cloud Run and Cloud Build APIs enabled (the console usually prompts you, or you can enable them manually). Quickstarts
  4. Node.js (v18+ recommended) and npm installed.
  5. Google Cloud SDK (gcloud) installed and authenticated on your machine. Deploy services from source code

Step 1 – Create the backend project

Create a new folder and init package.json:

mkdir cloud-run-backend
cd cloud-run-backend
npm init -y
npm install express

Create index.js:

const express = require("express");

/**
 * Creates an Express application with a simple JSON endpoint
 *
 * @returns {import("express").Express} The configured Express app.
 */
function createApp() {
  const app = express();

  app.get("/", (req, res) => {
    res.json({
      message: "Hello from Cloud Run",
      project: "First backend",
      timestamp: new Date().toISOString(),
    });
  });

  return app;
}

/**
 * Starts the HTTP server for the given Express app.
 *
 * @param {import("express").Express} app - The Express application instance.
 * @returns {void}
 */
function startServer(app) {
  const port = process.env.PORT || 8080; // Cloud Run injects PORT
  app.listen(port, () => {
    // eslint-disable-next-line no-console
    console.log(`Server listening on port ${port}`);
  });
}

const app = createApp();
startServer(app);

The important detail:
Cloud Run will set an environment variable PORT. Your app must listen on that port.

Step 2 – Add the start script

Open package.json and add a "start" script:

{
   "name": "cloud-run-backend",
   "version": "1.0.0",
   "main": "index.js",
   "type": "commonjs",
   "scripts": {
      "start": "node index.js"
    },
   "dependencies": {
      "express": "^4.21.0"
   }
}

Cloud Run’s Node buildpack knows how to run npm start by default.

Step 3 – Test locally

npm install
npm start

You should see:

Server listening on port 8080

In another terminal:

curl http://localhost:8080

You’ll get a JSON response with your message and a timestamp.

If it works locally, you’re ready for the cloud.

Step 4 – Configure gcloud

Log in:

gcloud auth login

Set your project and region (example: australia-southeast1):

gcloud config set project YOUR_PROJECT_ID<br>gcloud config set run/region australia-southeast1

Pick the region closest to your users.

You can find your project ID in the Cloud Overview dashboard of your project:

Step 5 – Deploy to Cloud Run from source

From inside cloud-run-backend:

gcloud run deploy cloud-run-backend \
--source . \
--allow-unauthenticated

This single command:

  1. Sends your source code to Cloud Build
  2. Builds a container image (using buildpacks or Docker under the hood)
  3. Creates a Cloud Run service called cloud-run-backend
  4. Gives it a public HTTPS URL

At the end you’ll see something like:

Service [cloud-run-backend] revision [cloud-run-backend-00001-abc]
has been deployed and is serving 100 percent of traffic at:
https://cloud-run-backend-xxxxx-uc.a.run.app

Copy that URL, that’s your backend, live on the internet 🎉

Step 6 – Call your new backend

From anywhere:

curl https://cloud-run-backend-xxxxx-uc.a.run.app

or open it in the browser.

Cloud Run gives you:

  • HTTPS by default
  • Auto-scaling
  • A generous free tier (millions of requests/month) to experiment safely

TL;DR

  • If you’ve been living in Apps Script land and need a “real backend”, Cloud Run lets you run any containerized app (Node, Python, Go, React SSR…) without managing servers.
  • You build a tiny Node.js HTTP API that listens on the PORT environment variable.
  • You deploy it with a single command: gcloud run deploy cloud-run-backend \ --source . \ --allow-unauthenticated
  • Google Cloud builds the container for you, creates a Cloud Run service, and gives you a public HTTPS URL.
  • That URL can be called from React, Apps Script, or any frontend, and Cloud Run handles scaling, HTTPS, and a generous free tier in the background.

Conclusion

Cloud Run is a really nice bridge between the simplicity of Apps Script and the flexibility of “real” backends. You keep the good parts (no servers to manage, automatic scaling, pay-per-use) and you unlock the ability to run any language or framework you like.

In this tutorial, you:

  • Created a small Node.js API
  • Tested it locally
  • Deployed it to Cloud Run from source
  • Got a live HTTPS URL you can plug into any frontend

From here, you can start wiring Cloud Run into your own projects: connect it to a React app, protect your endpoints with authentication, or add a database like Firestore or Cloud SQL.

If you try this out or deploy your own mini SaaS on Cloud Run, let me know, I’d love to see what you build !